EC-CUBEとは
株式会社イーシーキューブが開発・提供するECオープンプラットフォームです。
EC-CUBEは「日本発オープンソース」のEC構築システムとして、「リアル店舗のようにネットショップにも個性を」というビジョンのもと2006年に開発されました。
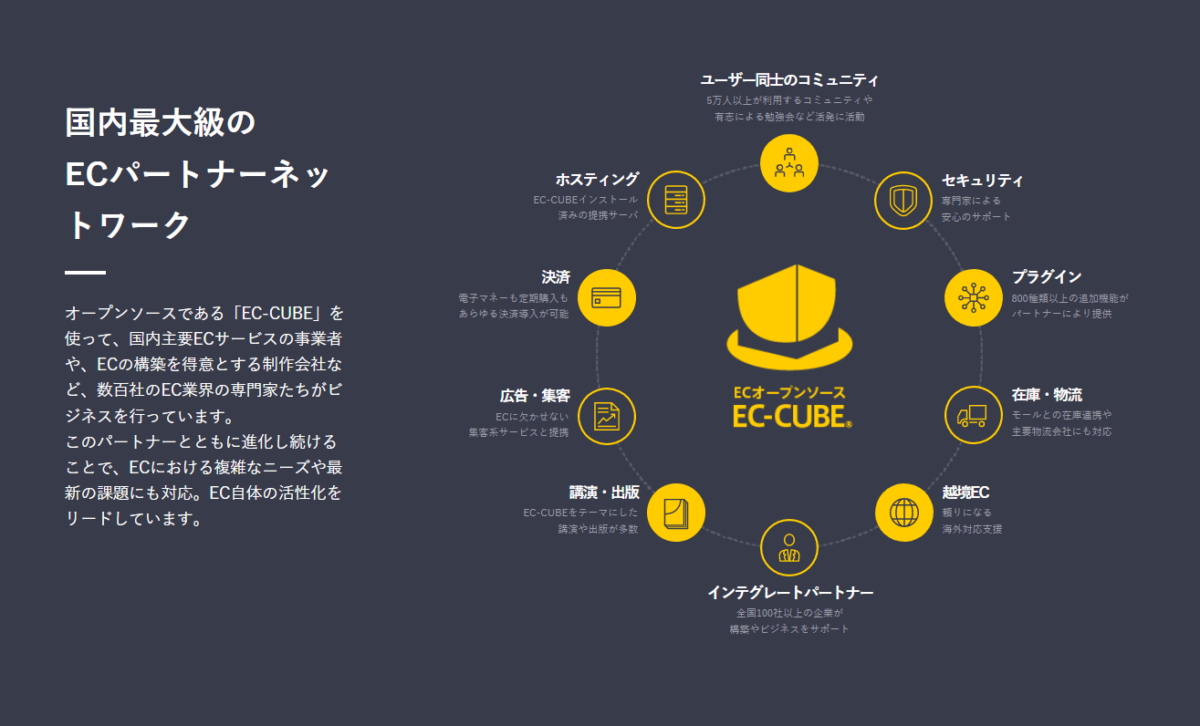
以降、日本国内だけでも35,000店舗以上、年間流通総額2,100億円、180万ダウンロードを突破。全国の開発者や数百社のEC関連企業がEC-CUBE経済圏を構成しビジネスを行っています。
ECオープンプラットフォームとして、低コストでありながら、フルスクラッチに迫るカスタマイズ性を有するEC-CUBEは、こだわりのあるネットショップ構築に、他では代替えできない立ち位置を確立しています。
オフィシャルサイト
オフィシャルサイトでは、各企業の導入事例(実際のサイト)を見ることが出来ます。

EC-CUBEクラウド
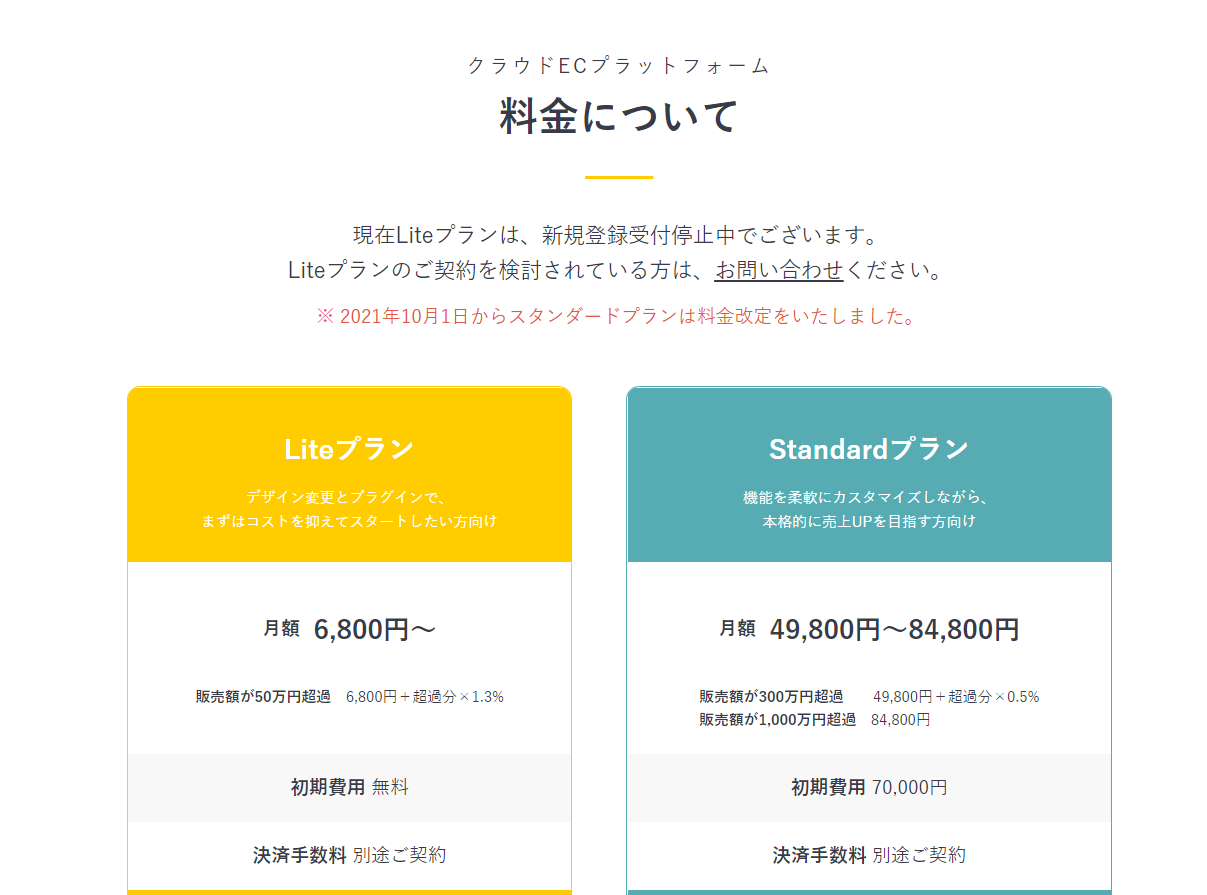
公式サイトでは、EC-CUBEクラウド版も提供されています。ただし月額の利用料金は6,800円~で、販売額が50万円を超過したら、超過分の1.3%が必要です。
また、私がサイトを確認したときはLiteプランは新規登録受付停止中のため、Standardプランのみが申請可能でした。
(2022/6/19時点)
VPSでのEC-CUBE4の環境構築はDockerがおすすめ
VPSでEC-CUBEを使う上で、おすすめはDockerを使うことです。
Dockerを使うことで、ミドルウェアのインストールなどの環境構築をコマンド1つで作り上げることが出来ます。
またVPSは、ランニングコストを抑えるために、「国内最安値」のWebARENA (Indigo) を利用します。
もし、まだVPS(Docker環境構築)が出来てない場合は、
VPS WebARENA (Indigo) でDocker環境構築
を参考に環境準備を進めて頂ければと思います。
もし環境構築の代行が必要であれば、お問い合わせフォームからお気軽にご連絡を頂ければと思います。
EC-CUBE4の環境構築の手順
はじめに環境準備の手順についてです。
- EC-CUBE4をダウンロードで取得
- サーバへファイル転送
- アップロードファイルの権限変更
- docker-compose でコンテナ起動
- EC-CUBEのインストール実行
- ファイヤーウォールの設定確認
- 動作確認
EC-CUBE4をダウンロードで取得
まずはEC-CUBE4 ダウンロード版 からEC-CUBEをダウンロードします。
私が環境を構築した2022/6月現在の最新バージョンは4.1.2でした。

サーバへEC-CUBEのファイル転送
ファイル転送の準備(WinSCP)
ダウンロードしたファイルを解凍し、サーバへアップロードします。
ファイルのアップロードにはWinSCPなどのファイル転送ソフトを使います。
WinSCPは、オープンソースで開発されているFTP/SFTP/SCPクライアントソフトです。

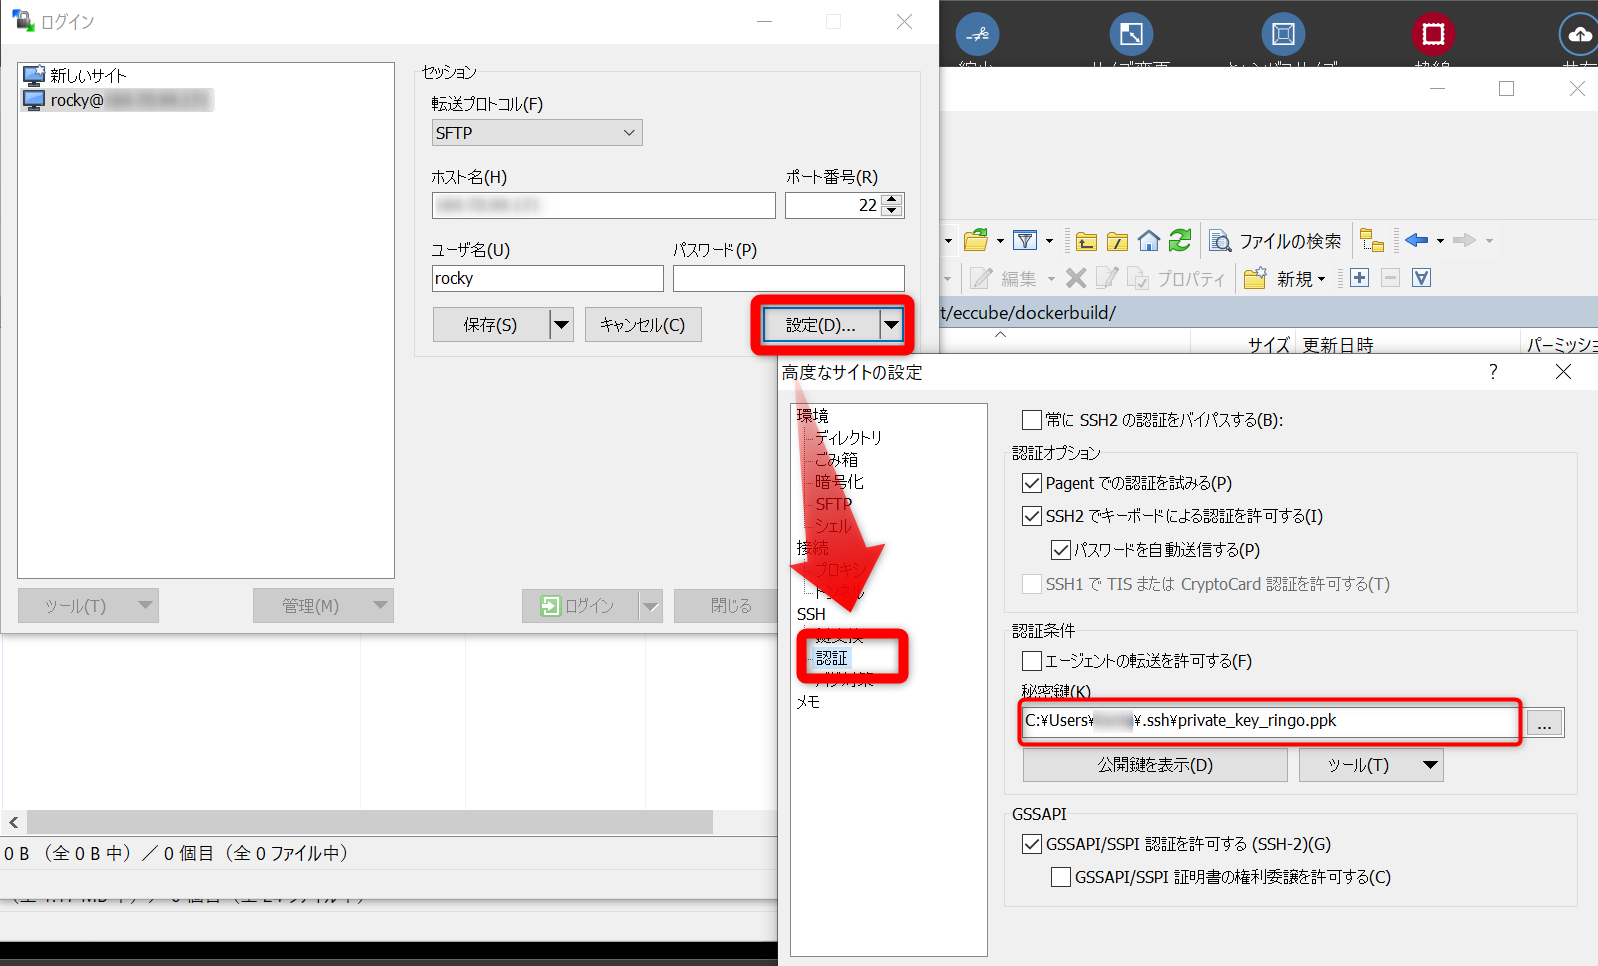
認証はSSH鍵での公開鍵暗号方式となりますので、「設定」から「SSH-認証」を開き、
秘密鍵にSSH鍵作成の際に取得したファイルを指定します。
EC-CUBEファイルのアップロード
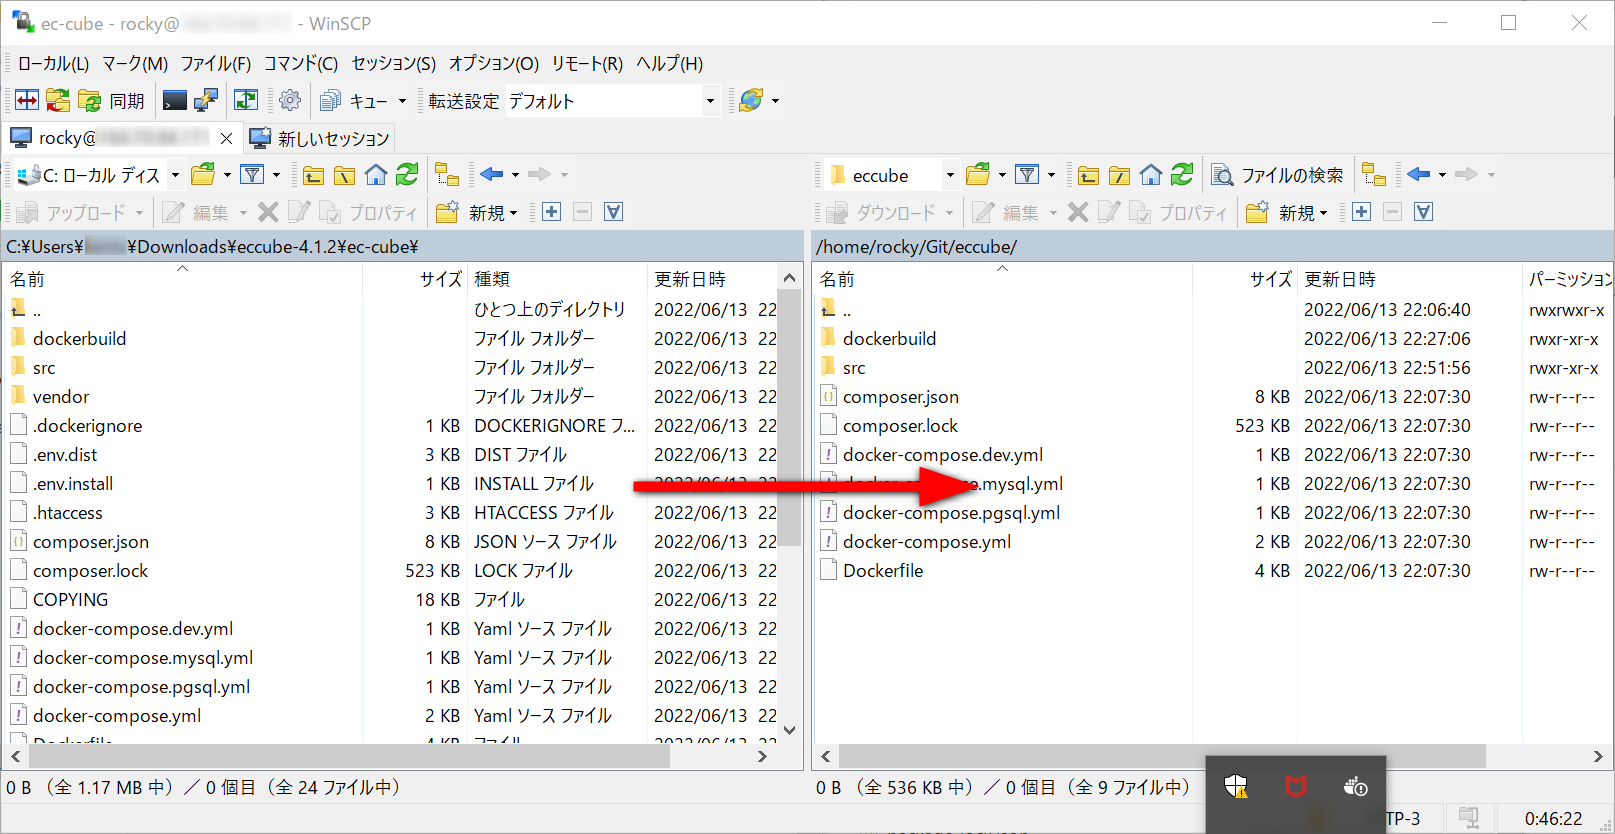
接続が確認できたら、右側にサーバにアクセス先のファイルが表示されますので、
EC-CUBEを起動するフォルダ(後でdocker-compose upする場所)に、ファイルを転送します。
解凍後のフォルダは225MBで、転送には10分ほどかかりました。
※ネットワークや契約サーバによって転送時間は変動します。
私が最初に環境を構築した際は、docker-compose.ymlの4ファイルだけを持っていって、
docker-composeしたのですが、File Not Foundが発生して起動できませんでした。
全部のファイルが必要となりますので、ここは気長に待ちます。
アップロードファイルの権限変更
この作業は、ファイルの転送方法によっては不要かもしれませんが、
私の環境では発生したため、対応した手順を載せておきます。
“bin/console”への実行権限付与
docker-compose実行時に以下の権限エラーが発生したため、consoleへ実行権限を付与しました。
OCI runtime exec failed: exec failed: unable to start container process: exec: "bin/console": permission denied: unknown
$ docker exec -it eccube_ec-cube_1 /bin/bash

# cd /var/www/html/bin/
実行前は、確かにconsoleに実行家権限がついていません。
# ls -al
total 20
drwxr-xr-x.  2 1000 987   76 Jun 13 14:41 .
drwxr-xr-x. 12 1000 987 4096 Jun 13 14:41 ..
-rw-r--r--.  1 1000 987   30 Jun 13 13:57 .htaccess
-rw-r--r--.  1 1000 987 1037 Jun 13 13:57 console
-rw-r--r--.  1 1000 987  612 Jun 13 13:57 phpunit
-rw-r--r--.  1 1000 987 2250 Jun 13 13:57 template_jp.php
そのためchmodで権限を付与します。
# chmod +x console

# ls -al
total 20
drwxr-xr-x.  2 1000 987   76 Jun 13 14:41 .
drwxr-xr-x. 12 1000 987 4096 Jun 13 14:41 ..
-rw-r--r--.  1 1000 987   30 Jun 13 13:57 .htaccess
-rwxr-xr-x.  1 1000 987 1037 Jun 13 13:57 console
-rw-r--r--.  1 1000 987  612 Jun 13 13:57 phpunit
-rw-r--r--.  1 1000 987 2250 Jun 13 13:57 template_jp.php
oauthフォルダへのファイル書込権限付与
docker-compose実行時に以下の権限エラーが発生したため、oauthフォルダへ書込権限を付与しました。
Warning: file_put_contents(/var/www/html/app/PluginData/Api/oauth/private.key): failed to open stream: Permission denied
oauthフォルダへの書き込み権限は所有者のみとなっています。
/var/www/html/app/PluginData/Api# ls -al
total 0
drwxr-xr-x. 3 1000 987 19 Jun 13 14:41 .
drwxr-xr-x. 3 1000 987 33 Jun 13 14:41 ..
drwxr-xr-x. 2 1000 987  6 Jun 13 14:41 oauth
そのためoauthフォルダへ書込権限を付与します。
# chmod a+w oauth

# ls -al
total 0
drwxr-xr-x. 3 1000 987 19 Jun 13 14:41 .
drwxr-xr-x. 3 1000 987 33 Jun 13 14:41 ..
drwxrwxrwx. 2 1000 987  6 Jun 13 14:41 oauth
docker-compose でコンテナ起動
以下のdocker-composeファイルが存在することを確認します。
$ ll
total 20
-rw-r--r--. 1 rocky docker   81 Jun 13 13:07 docker-compose.dev.yml
-rw-r--r--. 1 rocky docker  498 Jun 13 13:07 docker-compose.mysql.yml
-rw-r--r--. 1 rocky docker  486 Jun 13 13:07 docker-compose.pgsql.yml
-rw-r--r--. 1 rocky docker 1905 Jun 13 13:07 docker-compose.yml
-rw-r--r--. 1 rocky docker 3797 Jun 13 13:07 Dockerfile
以下のコマンドを実行し、サービスを起動します。
$ docker-compose -f docker-compose.yml -f docker-compose.mysql.yml -f docker-compose.dev.yml up -d
問題がなければ、以下のサービスが起動するはずです。
- ec-cube_ec-cube
- schickling/mailcatcher
- mysql:5.7
$ docker ps
CONTAINER ID   IMAGE NAMES                              COMMAND                  CREATED       STATUS      PORTS
e961ab5d3cba   ec-cube_ec-cube                          "docker-php-entrypoi…"   4 days ago    Up 4 days   0.0.0.0:8080->80/tcp, 0.0.0.0:4430->443/tcp      ec-cube_ec-cube_1
9355c714c318   schickling/mailcatcher                   "sh -c 'mailcatcher …"   4 days ago    Up 4 days   0.0.0.0:1025->1025/tcp, 0.0.0.0:1080->1080/tcp   ec-cube_mailcatcher_1
758e4cd29eca   mysql:5.7                                "docker-entrypoint.s…"   4 days ago    Up 4 days   33060/tcp, 0.0.0.0:13306->3306/tcp               ec-cube_mysql_1
実際は、Dockerfileに31ステップあるため、実際には30分くらいはかかった気がします。
<details>
<summary>実際の実行ログ</summary>
$ docker-compose -f docker-compose.yml -f docker-compose.mysql.yml -f docker-compose.dev.yml up -d
Building ec-cube
Sending build context to Docker daemon  5.452MB
Step 1/31 : FROM php:7.4-apache-bullseye
 ---> 54884b354869
Step 2/31 : ENV APACHE_DOCUMENT_ROOT /var/www/html
 ---> Using cache
 ---> 46e6748d2c02
Step 3/31 : RUN apt update   && apt upgrade -y   && apt install --no-install-recommends -y     apt-transport-https     apt-utils     build-essential     curl     debconf-utils     gcc     git     vim     gnupg2     libfreetype6-dev     libicu-dev     libjpeg62-turbo-dev     libpng-dev     libpq-dev     libzip-dev     locales     ssl-cert     unzip     zlib1g-dev     libwebp-dev   && apt upgrade -y ca-certificates   && apt clean   && rm -rf /var/lib/apt/lists/*   && echo "en_US.UTF-8 UTF-8" >/etc/locale.gen   && locale-gen   ;
 ---> Using cache
 ---> 33e593fded09
Step 4/31 : RUN docker-php-ext-configure pgsql -with-pgsql=/usr/local/pgsql   && docker-php-ext-configure gd --with-freetype --with-jpeg --with-webp   && docker-php-ext-install -j$(nproc) zip gd mysqli pdo_mysql opcache intl pgsql pdo_pgsql   ;
 ---> Using cache
 ---> bc832c73e36c
Step 5/31 : RUN pecl install apcu && echo "extension=apcu.so" > /usr/local/etc/php/conf.d/apc.ini
 ---> Using cache
 ---> b715537ce5b3
Step 6/31 : RUN curl -sL https://deb.nodesource.com/setup_12.x | bash -   && apt update   && apt install -y nodejs   && apt clean   ;
 ---> Using cache
 ---> a37caeb61ae8
Step 7/31 : RUN mkdir -p ${APACHE_DOCUMENT_ROOT}   && sed -ri -e 's!/var/www/html!${APACHE_DOCUMENT_ROOT}!g' /etc/apache2/sites-available/*.conf   && sed -ri -e 's!/var/www/!${APACHE_DOCUMENT_ROOT}!g' /etc/apache2/apache2.conf /etc/apache2/conf-available/*.conf   ;
 ---> Using cache
 ---> 9f6a83c2af78
Step 8/31 : RUN a2enmod rewrite headers ssl
 ---> Using cache
 ---> d45a1b5aa3b6
Step 9/31 : RUN ln -s /etc/apache2/sites-available/default-ssl.conf /etc/apache2/sites-enabled/default-ssl.conf
 ---> Using cache
 ---> 6e3fa48142c7
Step 10/31 : EXPOSE 443
 ---> Using cache
 ---> cca9f6e1dd83
Step 11/31 : RUN mv "$PHP_INI_DIR/php.ini-production" "$PHP_INI_DIR/php.ini"
 ---> Using cache
 ---> 3016b1c8d829
Step 12/31 : COPY dockerbuild/php.ini $PHP_INI_DIR/conf.d/
 ---> Using cache
 ---> 35ce834499d4
Step 13/31 : COPY dockerbuild/docker-php-entrypoint /usr/local/bin/
 ---> Using cache
 ---> 96fec549b141
Step 14/31 : RUN chown www-data:www-data /var/www   && mkdir -p ${APACHE_DOCUMENT_ROOT}/vendor   && mkdir -p ${APACHE_DOCUMENT_ROOT}/var   && chown www-data:www-data ${APACHE_DOCUMENT_ROOT}/vendor   && chmod g+s ${APACHE_DOCUMENT_ROOT}/vendor   && chown www-data:www-data ${APACHE_DOCUMENT_ROOT}/var
 ---> Using cache
 ---> 32e4a28e967d
Step 15/31 : RUN curl -sS https://getcomposer.org/installer   | php   && mv composer.phar /usr/bin/composer
 ---> Using cache
 ---> 9e25de634095
Step 16/31 : RUN composer config -g repos.packagist composer https://packagist.jp
 ---> Using cache
 ---> 3145fea80201
Step 17/31 : COPY composer.json ${APACHE_DOCUMENT_ROOT}/composer.json
 ---> Using cache
 ---> 0b3a720b89d0
Step 18/31 : COPY composer.lock ${APACHE_DOCUMENT_ROOT}/composer.lock
 ---> Using cache
 ---> aed0a2ac02bb
Step 19/31 : RUN chown www-data:www-data ${APACHE_DOCUMENT_ROOT}/composer.*
 ---> Using cache
 ---> cfd4726d110d
Step 20/31 : USER www-data
 ---> Using cache
 ---> 5c87d0b0eafd
Step 21/31 : RUN composer install   --no-scripts   --no-autoloader   --no-plugins   -d ${APACHE_DOCUMENT_ROOT}   ;
 ---> Using cache
 ---> 7e38e0b43a6e
Step 22/31 : USER root
 ---> Using cache
 ---> 0dd9db65ca5e
Step 23/31 : COPY . ${APACHE_DOCUMENT_ROOT}
 ---> 8e59d42fee50
Step 24/31 : WORKDIR ${APACHE_DOCUMENT_ROOT}
 ---> Running in 386e2e75ff67
Removing intermediate container 386e2e75ff67
 ---> 1c69f75eb34f
Step 25/31 : RUN find ${APACHE_DOCUMENT_ROOT} \( -path ${APACHE_DOCUMENT_ROOT}/vendor -prune \) -or -print0   | xargs -0 chown www-data:www-data   && find ${APACHE_DOCUMENT_ROOT} \( -path ${APACHE_DOCUMENT_ROOT}/vendor -prune \) -or \( -type d -print0 \)   | xargs -0 chmod g+s   ;
 ---> Running in afeb8e14baef
Removing intermediate container afeb8e14baef
 ---> 57b3a165f18b
Step 26/31 : USER www-data
 ---> Running in d3e6f20deac0
Removing intermediate container d3e6f20deac0
 ---> 228ce74e1b2f
Step 27/31 : RUN composer dumpautoload -o --apcu
 ---> Running in 34e0ff964485
Generating optimized autoload files
composer/package-versions-deprecated: Generating version class...
composer/package-versions-deprecated: ...done generating version class
Carbon 1 is deprecated, see how to migrate to Carbon 2.
https://carbon.nesbot.com/docs/#api-carbon-2
    You can run './vendor/bin/upgrade-carbon' to get help in updating carbon and other frameworks and libraries that depend on it.
Generated optimized autoload files containing 24400 classes
Removing intermediate container 34e0ff964485
 ---> c9902f80f4ca
Step 28/31 : RUN if [ ! -f ${APACHE_DOCUMENT_ROOT}/.env ]; then         cp -p .env.dist .env         ; fi
 ---> Running in d7a4be3392c2
Removing intermediate container d7a4be3392c2
 ---> abff418d305a
Step 29/31 : ARG SKIP_INSTALL_SCRIPT_ON_DOCKER_BUILD=false
 ---> Running in f561160f8cc7
Removing intermediate container f561160f8cc7
 ---> d354d50123ae
Step 30/31 : RUN if [ ! -f ${APACHE_DOCUMENT_ROOT}/var/eccube.db ] && [ ! ${SKIP_INSTALL_SCRIPT_ON_DOCKER_BUILD} = "true" ]; then         composer run-script installer-scripts && composer run-script auto-scripts         ; fi
 ---> Running in 22721f91c7c3
Removing intermediate container 22721f91c7c3
 ---> 10ca44b2cedc
Step 31/31 : USER root
 ---> Running in 0175e968ea67
Removing intermediate container 0175e968ea67
 ---> f05281626528
Successfully built f05281626528
Successfully tagged eccube_ec-cube:latest
</details>
EC-CUBEのインストール実行
コンテナ起動が成功したら、以下のコマンドを実行してEC-CUBEの初期化を実施します。
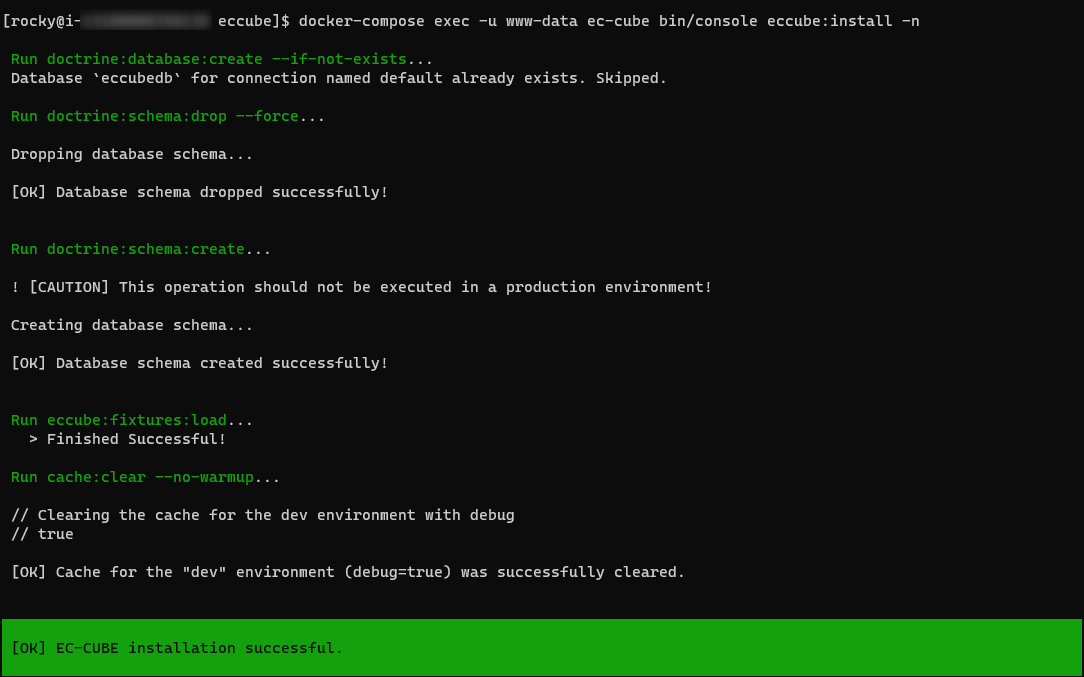
$ docker-compose exec -u www-data ec-cube bin/console eccube:install -n
全て正常終了すれば、
[OK] EC-CUBE installation successful.
と表示されます。
<details>
<summary>実際の実行ログ</summary>
$ docker-compose exec -u www-data ec-cube bin/console eccube:install -n

 Run doctrine:database:create --if-not-exists...
 Database `eccubedb` for connection named default already exists. Skipped.

 Run doctrine:schema:drop --force...

 Dropping database schema...

 [OK] Database schema dropped successfully!


 Run doctrine:schema:create...

 ! [CAUTION] This operation should not be executed in a production environment!

 Creating database schema...

 [OK] Database schema created successfully!


 Run eccube:fixtures:load...
   > Finished Successful!

 Run cache:clear --no-warmup...

 // Clearing the cache for the dev environment with debug
 // true

 [OK] Cache for the "dev" environment (debug=true) was successfully cleared.


 [OK] EC-CUBE installation successful.
</details>
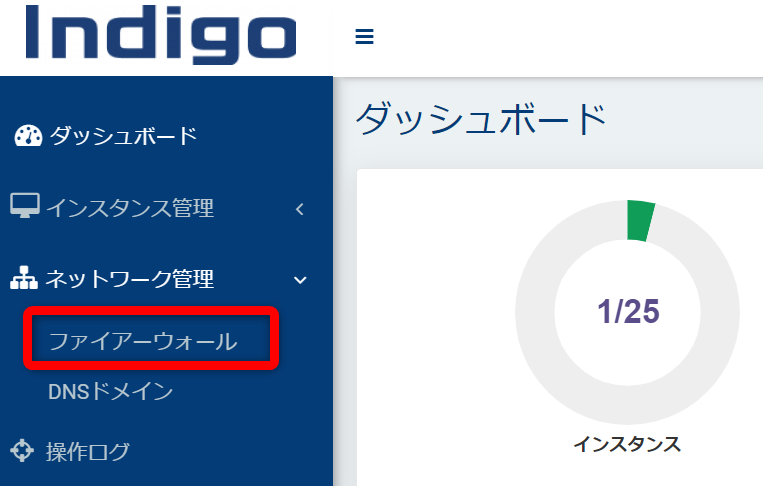
ファイヤーウォールの設定確認
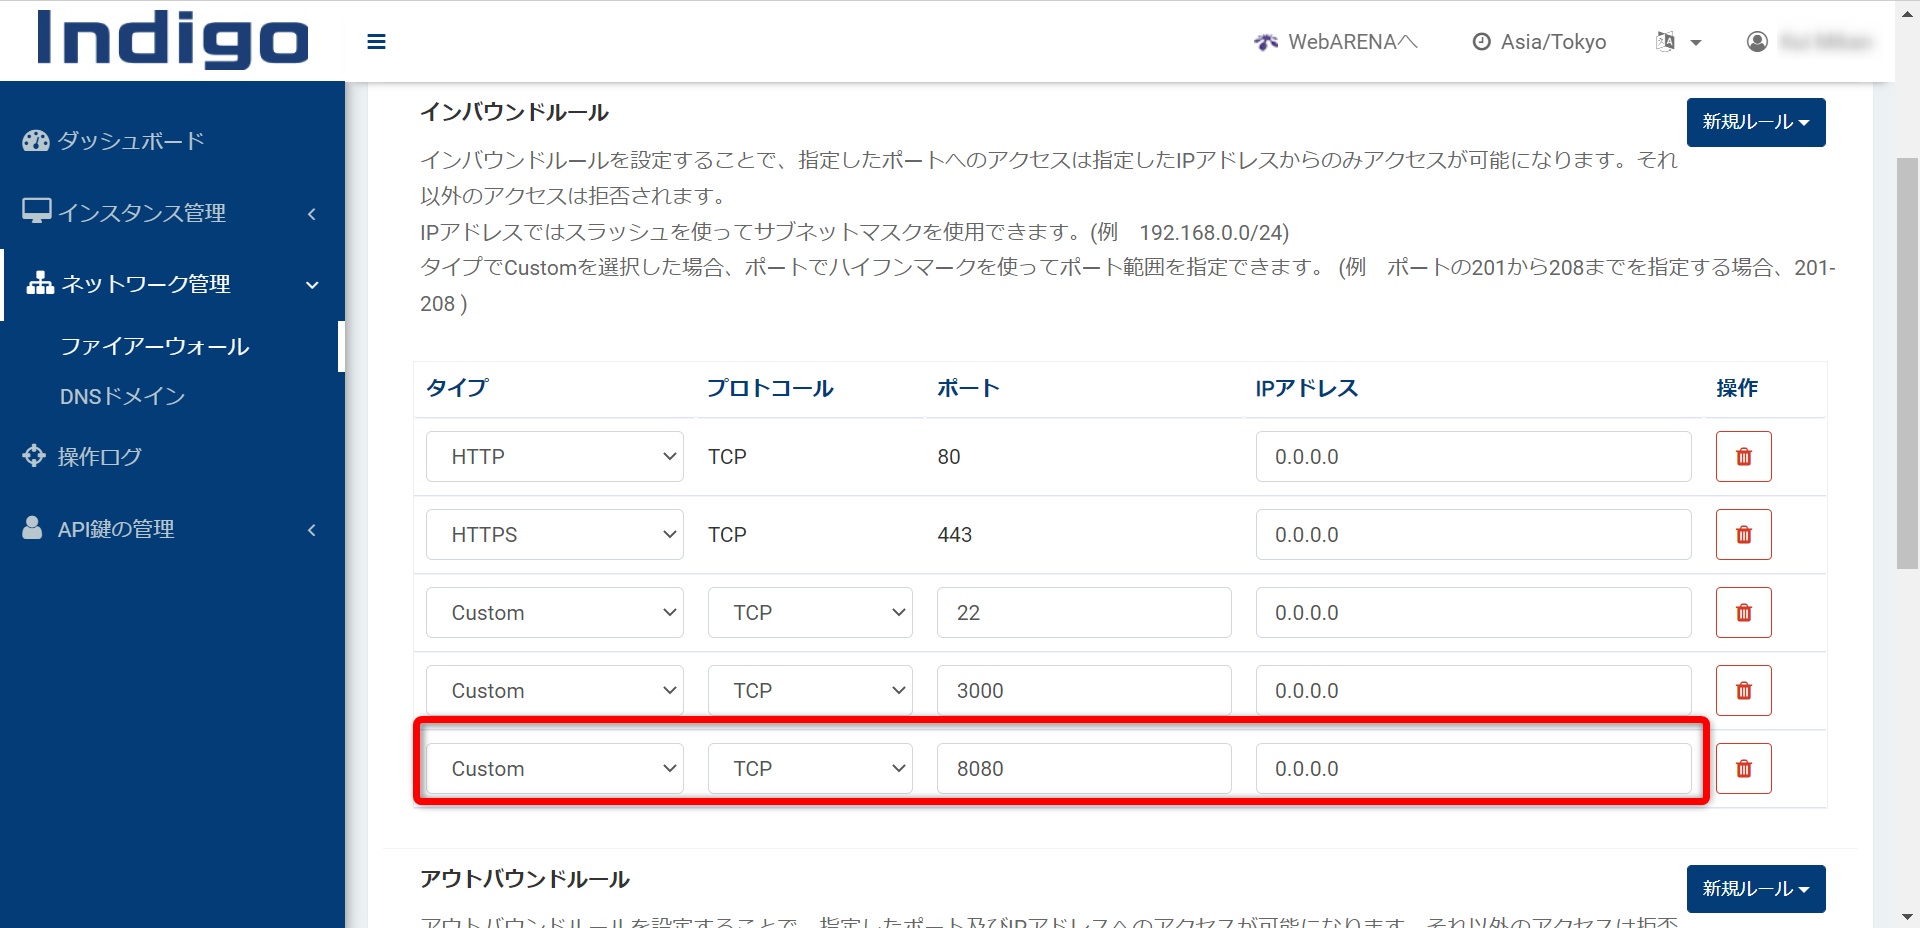
接続に必要なポート番号を確認します。もしお試しで「8080」での接続を実施している場合は、
既存のファイヤーウォールでは設定がされていないかもしれません。
私はまんまと引っ掛かり、Request timeoutを何度も発生させてしまいました。
必要なファイヤーウォールの設定を追加します。
画面表示確認
初回起動は、EC-CUBEが必要なプラグインをダウンロードするため時間がかかります。
30分くらいかかった気がします。
気長に待ちます。
正常に完了すれば、以下の初期画面が表示されます。

EC-CUBEを起動した際のリソース使用状況
今回、 VPS WebARENA (Indigo) 最安値スペックでインストールしたため、
とても運用に耐えられる性能ではありませんでした。
というかサーバが落ちまくりました。
実運用では、メモリ/CPUはEC-CUBEの推奨スペックで考えた方がよさそうです。
参考までに、各リソース使用状況を載せておきます。
ディスク容量
ディスク容量は問題なさそうでした。
df -h
Filesystem      Size  Used Avail Use% Mounted on
devtmpfs        367M     0  367M   0% /dev
tmpfs           403M     0  403M   0% /dev/shm
tmpfs           403M   26M  377M   7% /run
tmpfs           403M     0  403M   0% /sys/fs/cgroup
/dev/vda1        20G  6.1G   14G  31% /
tmpfs            81M     0   81M   0% /run/user/1000
メモリ
サーバが落ちた原因はこれかなぁと。最大で800MBしかないプランなので。。。
実運用はもっと上のプランがいいかなと。
$ free -m
              total        used        free      shared  buff/cache   available
Mem:            804         486          54          30         264         171
Swap:             0           0           0
CPUとか色々 (プロセスはメモリ使用が多い順)
一番メモリを使っているのは、DBサービスの「mysqld」でした。
その次に「dockerd」です。
top - 03:08:09 up 4 days, 12:51,  2 users,  load average: 0.00, 0.10, 2.12
Tasks: 118 total,   3 running, 115 sleeping,   0 stopped,   0 zombie
%Cpu(s):  1.3 us,  1.0 sy,  0.0 ni, 96.3 id,  0.0 wa,  0.3 hi,  1.0 si,  0.0 st
MiB Mem :    804.8 total,     53.5 free,    480.4 used,    271.0 buff/cache
MiB Swap:      0.0 total,      0.0 free,      0.0 used.    176.9 avail Mem

    PID USER      PR  NI    VIRT    RES    SHR S  %CPU  %MEM     TIME+ COMMAND
 118304 systemd+  20   0 1115376 196184  15316 S   0.0  23.8   0:00.85 mysqld
   3676 root      20   0 1476328  54896   9100 S   0.0   6.7   3:02.06 dockerd
    848 root      20   0 1288272  35196   3116 S   0.0   4.3   0:54.28 containerd
 118526 root      20   0  381152  30456  23912 S   0.0   3.7   0:00.23 apache2
 118396 root      20   0   98280  26320    604 S   0.0   3.2   0:01.16 mailcatcher
    834 root      20   0  703272  14232      0 S   0.3   1.7  17:17.24 tuned
 118507 root      20   0  712392   8756   4812 S   0.0   1.1   0:00.60 containerd-shim
 118365 root      20   0  712648   8708   6308 S   0.0   1.1   0:00.67 containerd-shim
 118280 root      20   0  712648   8664   4668 S   0.0   1.1   0:00.68 containerd-shim
      1 root      20   0  175120   8396   3780 S   0.0   1.0   0:10.75 systemd
    727 polkitd   20   0 1851004   8168      0 S   0.0   1.0   0:01.07 polkitd
 118630 33        20   0  381192   7992   1436 S   0.0   1.0   0:00.00 apache2
 118631 33        20   0  381192   7992   1436 S   0.0   1.0   0:00.00 apache2
 118632 33        20   0  381192   7992   1436 S   0.0   1.0   0:00.00 apache2
 118633 33        20   0  381192   7992   1436 S   0.0   1.0   0:00.00 apache2
 118634 33        20   0  381192   7992   1436 S   0.0   1.0   0:00.00 apache2
    909 root      20   0  236136   7264   2208 S   0.0   0.9   0:21.32 rsyslogd
 117507 root      20   0  410812   6984   4640 S   0.0   0.8   0:00.14 sssd_be
 118473 root      20   0 1005060   6736   2036 S   0.0   0.8   0:00.00 docker-proxy
 118344 root      20   0 1005060   6700   2004 S   0.0   0.8   0:00.00 docker-proxy
 118332 root      20   0 1005060   6556   1864 S   0.0   0.8   0:00.00 docker-proxy
 118493 root      20   0 1005060   6536   1844 S   0.0   0.8   0:00.00 docker-proxy
 118683 rocky     20   0  278144   5256   4460 R   0.0   0.6   0:00.54 top
 117510 root      20   0   84372   5248   4376 S   0.0   0.6   0:00.15 systemd-journal
    660 root      20   0  116560   5184   2576 S   0.0   0.6   0:02.01 systemd-udevd
 116267 rocky     20   0  252920   4904      0 S   0.0   0.6   0:00.00 (sd-pam)
<参考> EC-CUBE4を起動時に発生したエラーと解決策
Read timed out
発生エラー
ERROR: for eccube_ec-cube_1 UnixHTTPConnectionPool(host='localhost', port=None): Read timed out. (read timeout=60)
対策
サーバを再起動した。
port is already allocated
発生エラー
$ docker-compose -f docker-compose.yml -f docker-compose.mysql.yml -f docker-compose.dev.yml up -d
Starting eccube_mysql_1       ... done
Starting eccube_mailcatcher_1 ... done
Starting eccube_ec-cube_1     ...
Starting eccube_ec-cube_1     ... error

ERROR: for eccube_ec-cube_1  Cannot start service ec-cube: driver failed programming external connectivity on endpoint eccube_ec-cube_1 (7438640bb26a38470863fe18fa060cc6534950545d4fa68bd84f10a0bfbd08d0): Bind for 0.0.0.0:4430 failed: port is already allocated
対策
dockerを再起動した
$ sudo service docker restart
Redirecting to /bin/systemctl restart docker.service
OCI runtime create failed
発生エラー
$ docker-compose -f docker-compose.yml -f docker-compose.mysql.yml -f docker-compose.dev.yml up -d
Starting eccube_mailcatcher_1 ... done
Starting eccube_mysql_1       ... done
Starting eccube_ec-cube_1     ... error

ERROR: for eccube_ec-cube_1  Cannot start service ec-cube: failed to create shim task: OCI runtime create failed: runc create failed: unable to start container process: exec: "docker-php-entrypoint": executable file not found in $PATH: unknown

ERROR: for ec-cube  Cannot start service ec-cube: failed to create shim task: OCI runtime create failed: runc create failed: unable to start container process: exec: "docker-php-entrypoint": executable file not found in $PATH: unknown
ERROR: Encountered errors while bringing up the project.
対策
「–force-recreate」を付与して実行
docker-compose -f docker-compose.yml -f docker-compose.mysql.yml -f docker-compose.dev.yml up -d --force-recreate
管理者のIDとパスワードが不明
docker-composeに見つけました。環境によっては違うかも。
admin
password
